For achieve the blur of out of focused areas one must often use lens with big apertures or/and a good focal length, and those are usually expensive, heavy, big or a combination of the three... The other way of achieve that effect is to simulate it artificially... and that it's kinda tricky, mainly because the original image to which you want to apply it doesn't have the entire information to do it....
The simplest way to increase blur or create blur to given out of focus areas would be when create miniature looking photos of a city, this is possible because cities are often layered in a simple plane and an overlayed blured picture using a gradient as mask does the trick in most of the cases....
Extending the concept, one can create a mask to protect focused areas and blur the rest, but bokeh doesn't have a regular radius blur, the bigger the distance from the focus plane is the blurrier the area looks, and that brings us to a depth map/mask ... sadly this is not easy to create, nor easy to apply as a mechanism of interpreting the depth must exist.
Taking care of a mechanism for doing it properly, i introduce you to GIMP Focus Blur Filter Plug-in (windows version)... Now how does that plug-in perform.... wonderfully i must say... sadly my 20mm f/1.7, while has a big aperture, sometimes it's not quite enough to blur the background as i wished it would do... so i searched and found this pearl... it is quite awesome to apply... the drawbacks?
I point two: It will take its time to be applied (in a 8MP image might take like 10mins!) and you really need a depth map if you want to see awesome results :]
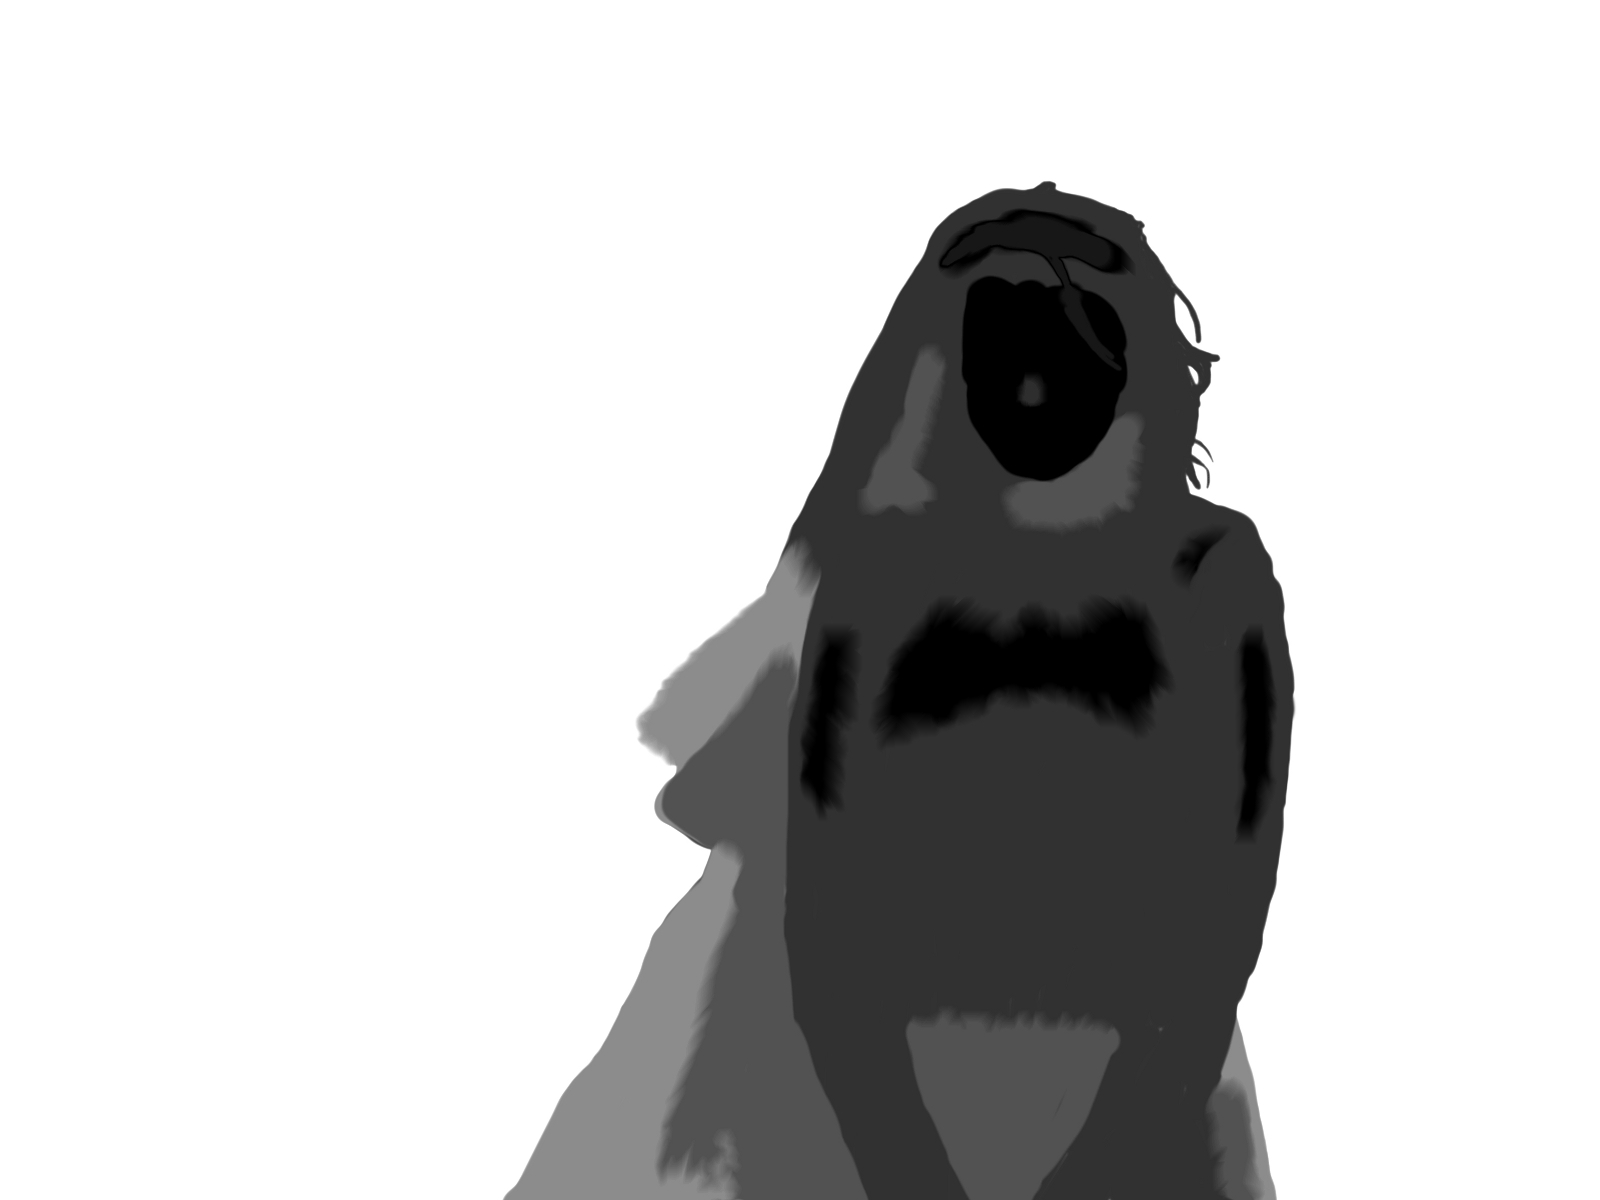
By the way, black means focused, white means fully unfocused.... in the middle ... is in the middle :] Well, to help you out with the depth map, i'll point you to another plugin: Depth map Plugin (windows version) ... It will create a depth map, but it has a requirement: You need to take two stereoscopic images, and that on moving stuff is only possible with two cameras (preferably identical)... it works pretty well, but you might want to retouch the depth map a bit for best results... Here goes an example of what you could do (Halloween Gothic Bride for the win): The original (well, not quite original, as this was cropped, noise was reduced, color corrected, details sharpened and reduced on the end for web view):
 The depth map i drawn (clumsy for the win):
 The end result using Flat model, 25px radius blur, 5px radius shine:
 This is simply the best plug-in I've ever found - and i don't even explored everything it has to give - this fella is just above tone mapping filter :]
No comments:
Post a Comment